Wilcom EmbroideryStudio: Professional Embroidery Design Software Guide
Creating professional embroidery designs requires more than attractive artwork. The design must also be digitized correctly so that stitches, thread density, sequencing, and fabric compatibility work together. Wilcom EmbroideryStudio is designed for this purpose, offering a professional environment for creating, editing, digitizing, and preparing embroidery designs for production.
Whether you are new to embroidery digitizing or already working with commercial embroidery machines, understanding the workflow can help you use the software more effectively. This guide explains the basic workflow, important features, use cases, advantages, limitations, and alternatives to Wilcom Embroidery Studio 2027.
Step 1: Create a New Project
The first step is to create a new embroidery project and establish the basic settings. Before designing, consider the fabric type, hoop size, embroidery machine, and final design dimensions.
A properly configured project provides a reliable foundation for the rest of the workflow. You can define the design area and other production-related settings before adding artwork or creating embroidery objects.
For beginners, starting with a simple design is useful. It allows you to understand how objects, stitch types, colors, and sequencing work without dealing with unnecessary complexity.
Step 2: Import Media / Setup
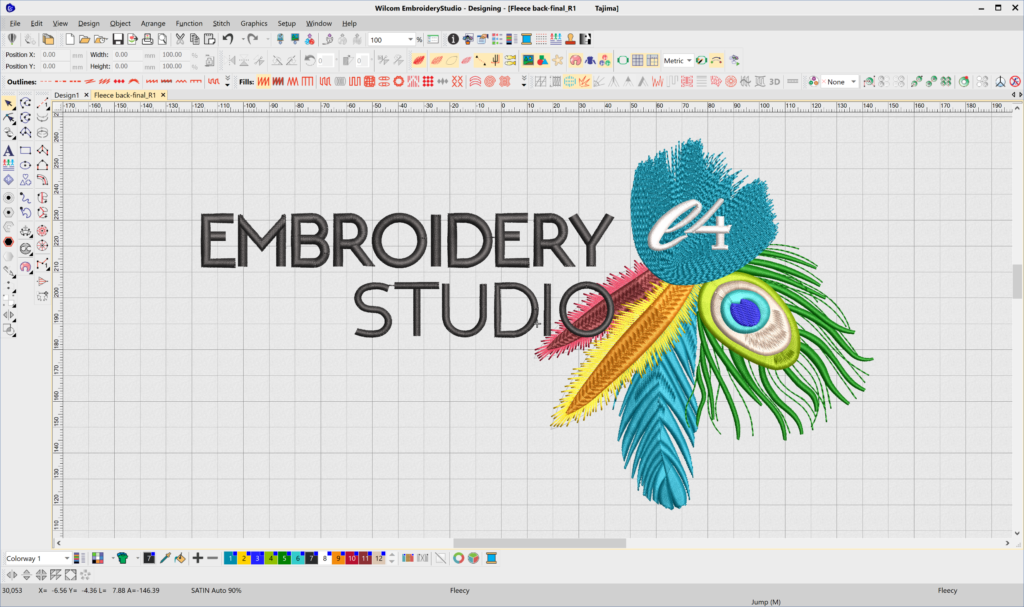
Once the project is created, the next step is to bring your artwork into the workspace. Wilcom EmbroideryStudio can be used to work from artwork that serves as a reference for embroidery digitizing.
The quality and simplicity of the original artwork can affect the digitizing process. Clean logos, shapes, and clearly defined elements are generally easier to convert into embroidery objects.
During setup, pay attention to:
- Design dimensions
- Hoop requirements
- Fabric characteristics
- Thread colors
- Artwork positioning
- Stitch direction
- Object sequence
Taking time to prepare these settings can reduce corrections later in the design process.
Step 3: Main Workflow (Editing and Design)
The main workflow in Wilcom EmbroideryStudio involves converting artwork or creating embroidery objects and then refining them for production. Different stitch types can be selected according to the shape and purpose of each design element.
For example, satin-style stitching can be suitable for borders and lettering, while fill stitching can cover larger areas. Running stitches may be useful for outlines and fine details.
Editing is an important part of professional embroidery digitizing. Designers can adjust object shapes, stitch directions, spacing, density, and sequencing to create a more controlled result.
Beginners should focus on understanding how each embroidery object behaves rather than relying entirely on automatic settings. Manual adjustments can be particularly important when working with detailed logos or challenging fabrics.
Step 4: Add Features, Effects, and Customization
After the basic embroidery design is created, additional features can be used to improve its appearance and production quality. Customization may involve changing stitch properties, adjusting colors, refining outlines, and modifying individual objects.
One of the important aspects of professional embroidery software is controlling how stitches interact with one another. Poor density or unsuitable stitch direction can cause problems such as excessive thread buildup, gaps, or an uneven appearance.
Depending on the project, designers may work with:
- Different stitch types
- Stitch density adjustments
- Underlay settings
- Stitch direction
- Object reshaping
- Lettering and monograms
- Color management
- Embroidery effects
- Object sequencing
These tools give experienced users greater control over the final embroidery result.
Step 5: Export / Save Output
After completing the design, it should be checked carefully before production. Reviewing object order, stitch counts, colors, dimensions, and other settings can help identify potential problems.
The final design can then be saved or prepared in an embroidery format supported by the intended production workflow. The correct format depends on the embroidery machine and its requirements.
It is also useful to maintain an editable project version separately from the production-ready machine file. This makes future modifications easier if the customer requests a different size, color combination, or fabric variation.
Best Use Cases for Wilcom EmbroideryStudio
Wilcom EmbroideryStudio can be useful in a variety of professional and creative embroidery environments.
Common applications include:
- Custom logo digitizing
- Corporate apparel embroidery
- Monogram and lettering projects
- Sportswear embroidery
- Promotional clothing
- Fashion embroidery
- Caps and hats
- Uniform decoration
- Custom patches
- Small embroidery businesses
- Commercial embroidery production
It can be especially useful for businesses that regularly need to convert artwork into production-ready embroidery designs and make detailed adjustments before stitching.
Advantages and Limitations
Advantages
Wilcom EmbroideryStudio offers a professional workflow focused specifically on embroidery design and digitizing. Its specialized tools provide designers with control over many technical aspects of embroidery production.
Key advantages include:
- Professional embroidery digitizing capabilities
- Detailed stitch and object control
- Support for complex embroidery workflows
- Tools for lettering and monogram design
- Customizable stitch properties
- Precise design editing
- Suitable for commercial embroidery environments
- Useful for both artwork conversion and original embroidery design
Another benefit is the ability to refine designs rather than simply converting artwork automatically. This level of control can be important when embroidery quality and production consistency matter.
Limitations
Professional embroidery software can have a learning curve, particularly for users who have never worked with digitizing concepts.
Some potential limitations include:
- Beginners may need time to learn the interface
- Professional features can be complex
- Effective digitizing requires embroidery knowledge
- High-quality results still depend on the designer’s skills
- Advanced workflows may require more powerful computer hardware
It is important to remember that software alone does not guarantee a perfect embroidered result. Fabric, thread, machine settings, needles, and digitizing decisions can all affect the final product.
Alternatives to Wilcom EmbroideryStudio
Depending on your workflow and experience level, several other embroidery design applications may be considered as alternatives to Wilcom EmbroideryStudio.
Some alternatives include:
- Hatch Embroidery
- Pulse embroidery software
- Tajima embroidery design solutions
- Bernina embroidery software
- Brother embroidery design software
The right option depends on factors such as digitizing requirements, machine compatibility, budget, ease of use, lettering needs, and the level of control required.
Frequently Asked Questions (FAQs)
What is Wilcom EmbroideryStudio?
Wilcom EmbroideryStudio is professional embroidery design and digitizing software used to create, edit, customize, and prepare embroidery designs for production.
Is Wilcom EmbroideryStudio suitable for beginners?
It can be used by beginners, but its professional features may require some learning. Understanding basic embroidery concepts such as stitch types, density, underlay, and sequencing can make the learning process easier.
Can Wilcom EmbroideryStudio be used for logo digitizing?
Yes. Logo digitizing is one of the common applications for professional embroidery software. Artwork can be converted into embroidery objects and then manually refined for production.
Can designs be customized after digitizing?
Yes. Designers can edit embroidery objects and modify properties such as stitch direction, density, dimensions, colors, and sequencing depending on the project.
Is embroidery software enough to produce high-quality embroidery?
No. Good software is an important part of the process, but results also depend on digitizing skills, fabric selection, thread, needles, machine settings, and production techniques.
Conclusion
Wilcom EmbroideryStudio provides a professional environment for embroidery digitizing, editing, lettering, customization, and production preparation. Its specialized workflow gives designers detailed control over embroidery objects and stitch properties, making it suitable for applications ranging from custom logos and uniforms to commercial embroidery production.
For beginners, learning the fundamentals of stitch types, density, underlay, sequencing, and fabric behavior is essential. With practice, these concepts can make it easier to create cleaner, more consistent, and production-ready embroidery designs using Wilcom EmbroideryStudio.
Download Wilcom EmbroideryStudio 2026
Telegram ID
eMail
Request for One Day Pro Demo For Free Pro Demo Download